
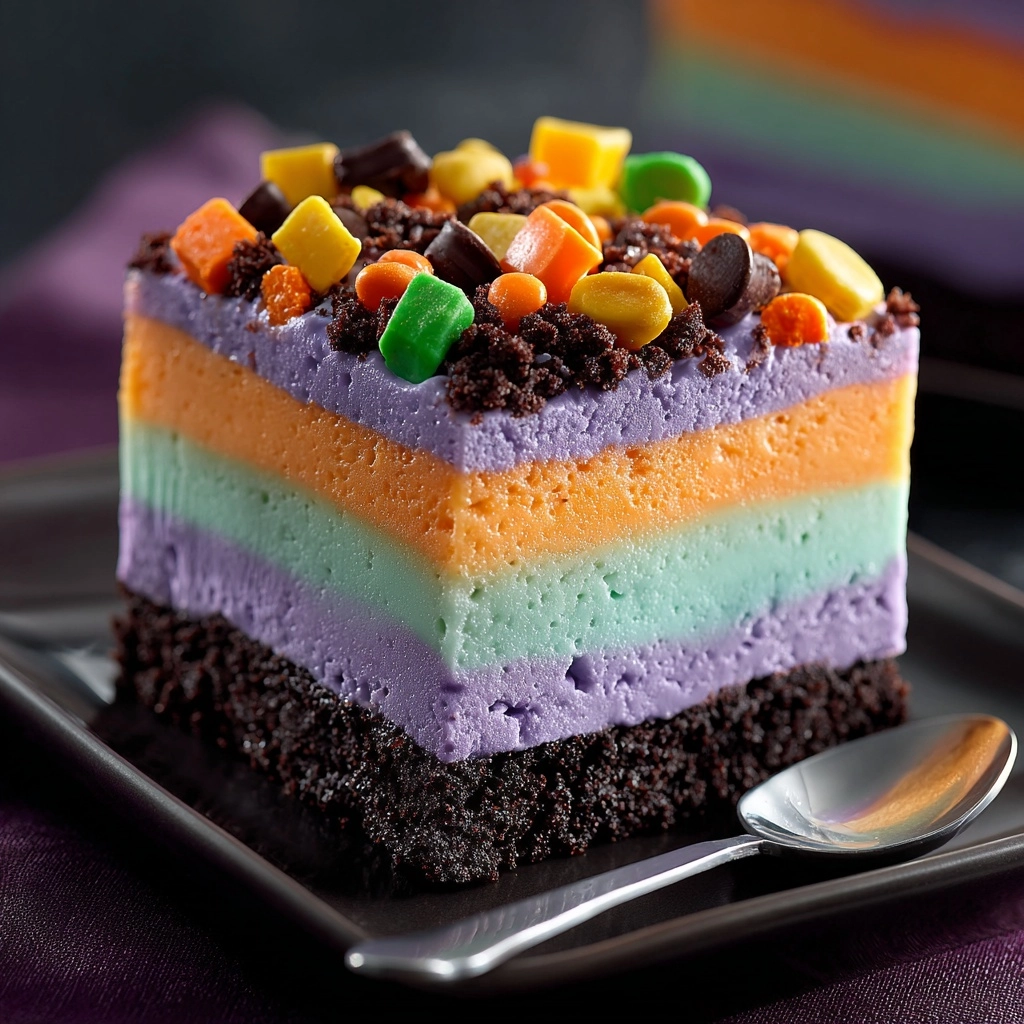
If you’re looking for an irresistibly festive, no-bake treat that will bring big smiles (and a little spookiness) to your Halloween spread, this Halloween Lush Dessert is your new go-to. With layers of chocolatey cookie crust, fluffy cream, and a hauntingly orange pudding, every bite is a playful mix of creamy, crunchy, sweet, and spooky. It’s easy enough for anyone to whip up, but impressive enough to steal the show at any Halloween party. Trust me, you’ll want to make double—this dessert vanishes faster than a ghost at midnight!
Ingredients You’ll Need
The magic of Halloween Lush Dessert is in its simple but carefully chosen ingredients. Each one brings something special to the table, whether it’s a pop of color, a creamy texture, or that classic chocolate flavor everyone loves.
- Chocolate sandwich cookies: Crushed to form a rich, chocolatey base that’s the perfect foundation for every luscious layer.
- Butter: Melted and mixed with the cookies to bind the crust and add a hint of salty-sweet richness.
- Cream cheese: Softened for easy blending and a tangy, creamy layer that balances the sweetness.
- Powdered sugar: Sweetens the cream cheese mixture without making it gritty.
- Vanilla extract: Adds warmth and depth to the creamy layer.
- Heavy whipping cream: Whipped to fluffy perfection and folded in for that dreamy, cloud-like texture.
- Instant chocolate pudding mix: Creates a silky, chocolatey layer that’s quick and easy to prepare.
- Cold milk: Helps the pudding set up thick and smooth.
- Orange food coloring: Gives the pudding its festive, Halloween-bright orange hue—so fun!
- Whipped topping: A pillowy finish that ties all the layers together; use homemade or store-bought to save time.
- Halloween sprinkles, candy eyes, or crushed cookies: For a playful and spooky garnish that makes your dessert party-ready.
How to Make Halloween Lush Dessert
Step 1: Create the Cookie Crust
Start by crushing your chocolate sandwich cookies into fine crumbs—either in a food processor or by placing them in a zip-top bag and smashing with a rolling pin. Mix the crumbs with melted butter in a medium bowl until they’re evenly coated, then press the mixture firmly into the bottom of a 9×9-inch dish. This will form a sturdy, chocolatey base that holds up beautifully under all those creamy layers.
Step 2: Whip Up the Cream Cheese Layer
In a separate bowl, beat the softened cream cheese until it’s smooth and lump-free. Add the powdered sugar and vanilla extract, mixing until everything is well combined. In another bowl, whip the heavy cream until stiff peaks form—this is what gives your dessert that dreamy, mousse-like texture. Gently fold the whipped cream into the cream cheese mixture, then spread this fluffy layer over the prepared crust, smoothing it out to the edges.
Step 3: Make the Spooky Pudding Layer
Grab a clean bowl and whisk together the instant chocolate pudding mix and cold milk for about 2 minutes, until thickened. Add a few drops of orange food coloring and mix well until you get that vibrant Halloween orange! Carefully spread this pudding layer over the cream cheese mixture, making sure not to disturb the layers below.
Step 4: Finish with Whipped Topping and Decorations
Spread the whipped topping evenly over the pudding layer, creating a smooth, snowy canvas. Now for the fun part: decorate with Halloween sprinkles, candy eyes, or even more crushed cookies. Get creative—the more festive, the better! Pop the whole dish in the fridge for at least two hours to let those layers set and the flavors meld.
How to Serve Halloween Lush Dessert
Garnishes
The finishing touches are where your Halloween Lush Dessert really comes alive. Scatter on a generous handful of Halloween sprinkles, candy eyeballs, or extra cookie crumbs right before serving. If you’re feeling extra crafty, pipe on little whipped cream ghosts or add gummy worms for a ghoulish twist. These simple garnishes not only look adorable but also add extra texture and flavor.
Side Dishes
Pair this lush dessert with lighter treats to balance the richness, like fresh orange segments, a platter of fruit kabobs, or even a bowl of popcorn for a classic party vibe. For a festive drink, serve up orange soda floats or bubbly apple cider—kids and adults alike will love them alongside this sweet, creamy treat!
Creative Ways to Present
There are so many fun ways to serve Halloween Lush Dessert! Try assembling individual portions in mason jars or clear cups for grab-and-go party servings. For a dramatic effect, layer the dessert in a trifle dish to show off every colorful layer. You can even use cookie cutters to cut out spooky shapes, then transfer to cupcake liners for single-serve fun.
Make Ahead and Storage
Storing Leftovers
Leftover Halloween Lush Dessert keeps beautifully in the refrigerator. Simply cover the dish tightly with plastic wrap or transfer slices to an airtight container. It will stay fresh and delicious for up to 3 days—if it lasts that long! The layers remain creamy and the cookie crust softens just a bit, making each bite even more indulgent.
Freezing
If you need to make Halloween Lush Dessert well in advance, you can freeze it! Wrap the entire dish tightly in plastic wrap and then foil, or portion out slices into freezer-safe containers. Freeze for up to 2 months. Thaw overnight in the fridge before serving. Note that the texture of the whipped topping may change slightly, but the flavor will still be spooktacular.
Reheating
No need to reheat this no-bake treat! Halloween Lush Dessert is meant to be served chilled, straight from the fridge. If frozen, just make sure to let it thaw completely in the refrigerator so the layers return to their creamy, dreamy texture.
FAQs
Can I make Halloween Lush Dessert ahead of time?
Absolutely! In fact, this dessert is even better when made a day ahead. The flavors have time to meld and the layers set up perfectly, making it super easy to slice and serve.
What if I don’t have orange food coloring?
No worries! You can leave out the food coloring for a classic chocolate look, or use a mix of red and yellow food coloring if you have those on hand. The flavor will still be deliciously chocolatey either way.
Can I use a different pudding flavor?
Yes! While chocolate is traditional for Halloween Lush Dessert, vanilla or pistachio pudding can add a fun twist. Just swap in your favorite flavor and adjust the food coloring as desired.
Is it possible to make this dessert gluten-free?
Definitely. Just use gluten-free chocolate sandwich cookies for the crust and make sure your pudding mix is gluten-free. All other ingredients should be naturally gluten-free, so you can share this treat with everyone.
How can I make the dessert less sweet?
If you prefer a less sweet version, use less powdered sugar in the cream cheese layer and opt for unsweetened whipped cream. You can also use dark chocolate pudding for a slightly more intense, less sugary chocolate flavor.
Final Thoughts
Halloween Lush Dessert is pure fun in a pan—colorful, creamy, and packed with festive flair. Whether you’re hosting a party or just want to wow your family, this treat is a guaranteed crowd-pleaser. Give it a try and watch everyone come back for seconds (and maybe even thirds)!
Print
Halloween Lush Dessert Recipe
- Prep Time: 25 minutes
- Cook Time: 0 minutes
- Total Time: 25 minutes (plus at least 2 hours chilling time)
- Yield: 9 servings
- Category: Dessert
- Method: No-Bake
- Cuisine: American
- Diet: Vegetarian
Description
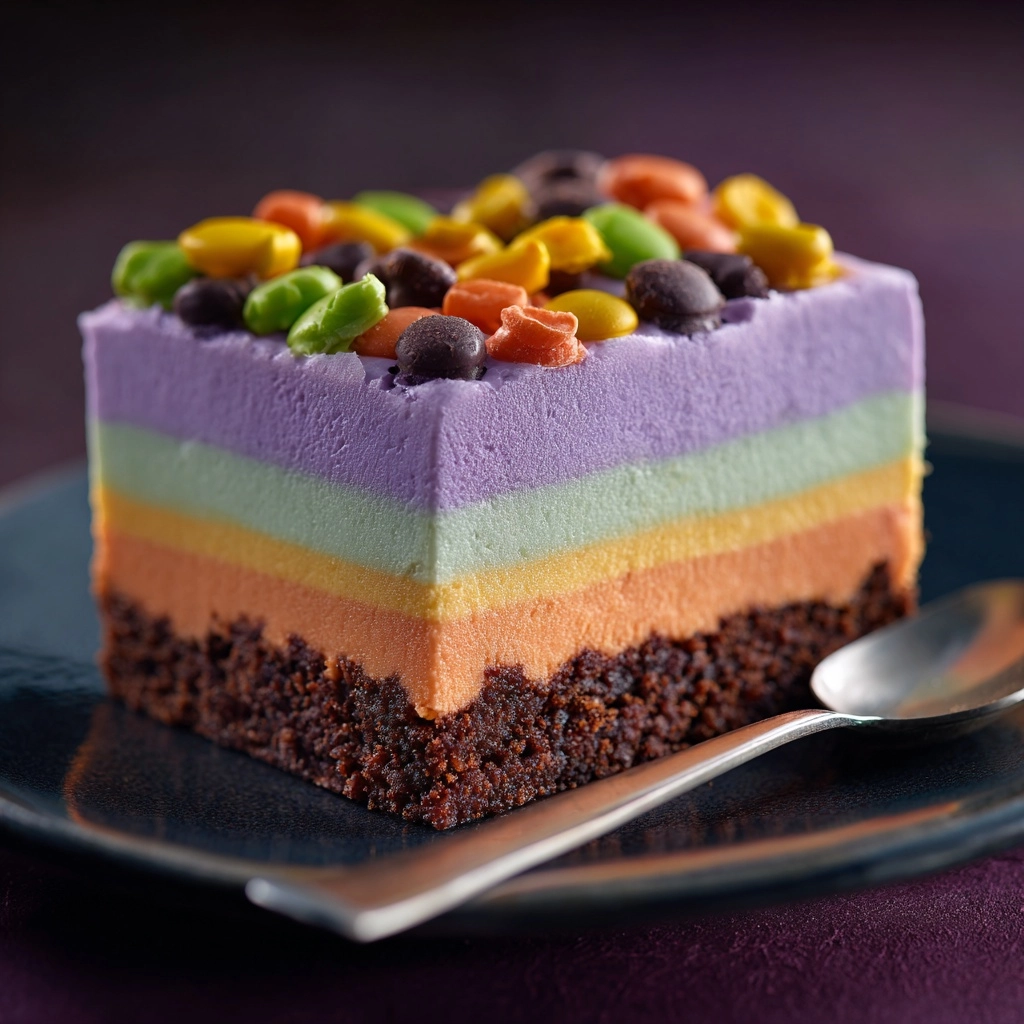
This Halloween Lush Dessert is a festive, no-bake treat perfect for spooky celebrations. Featuring layers of crushed chocolate sandwich cookies, creamy whipped cream infused with vanilla and cream cheese, and vibrant orange chocolate pudding, this dessert is beautifully topped with whipped topping and Halloween-themed decorations. It’s easy to prepare, requires no baking, and offers a deliciously rich and creamy texture that kids and adults will love.
Ingredients
Crust
- 20 chocolate sandwich cookies, crushed
- 4 tablespoons butter, melted
Cream Cheese Layer
- 8 oz cream cheese, softened
- 1/2 cup powdered sugar
- 1 teaspoon vanilla extract
- 1 cup heavy whipping cream
Pudding Layer
- 3.4 oz box instant chocolate pudding mix
- 1 1/2 cups cold milk
- Orange food coloring, to desired color
Topping and Garnish
- 8 oz whipped topping
- Halloween sprinkles, candy eyes, or crushed cookies for garnish
Instructions
- Prepare the crust: In a medium bowl, combine the crushed chocolate sandwich cookies with melted butter until well mixed. Press this mixture evenly into the bottom of a 9×9-inch dish to form the base crust layer.
- Make the cream cheese layer: In a separate bowl, beat the softened cream cheese until smooth. Add powdered sugar and vanilla extract and mix until fully incorporated. In another clean bowl, whip the heavy cream until stiff peaks form, then gently fold the whipped cream into the cream cheese mixture. Spread this creamy layer evenly over the prepared crust.
- Prepare the pudding layer: In a clean bowl, whisk together the instant chocolate pudding mix and cold milk for about 2 minutes until the mixture thickens. Add orange food coloring a few drops at a time until you achieve the desired vibrant orange color, then mix thoroughly. Spread the pudding layer evenly over the cream cheese layer.
- Add the topping and garnish: Spread the whipped topping evenly over the pudding layer. Decorate the dessert with Halloween sprinkles, candy eyes, or crushed cookies to add a festive touch.
- Chill and serve: Refrigerate the dessert for at least 2 hours to allow it to set and for the flavors to meld together. Cut into squares and serve chilled.
Notes
- You can use store-bought whipped topping instead of making whipped cream yourself to save time.
- For a Halloween twist, try substituting the chocolate pudding with vanilla or pistachio pudding.
- Make sure to chill the dessert well so it sets properly and slices cleanly.
- This dessert is best enjoyed within 2-3 days when kept refrigerated.
Nutrition
- Serving Size: 1 square (approx. 3×3 inches)
- Calories: 310
- Sugar: 22g
- Sodium: 260mg
- Fat: 21g
- Saturated Fat: 12g
- Unsaturated Fat: 7g
- Trans Fat: 0g
- Carbohydrates: 28g
- Fiber: 1g
- Protein: 3g
- Cholesterol: 45mg

