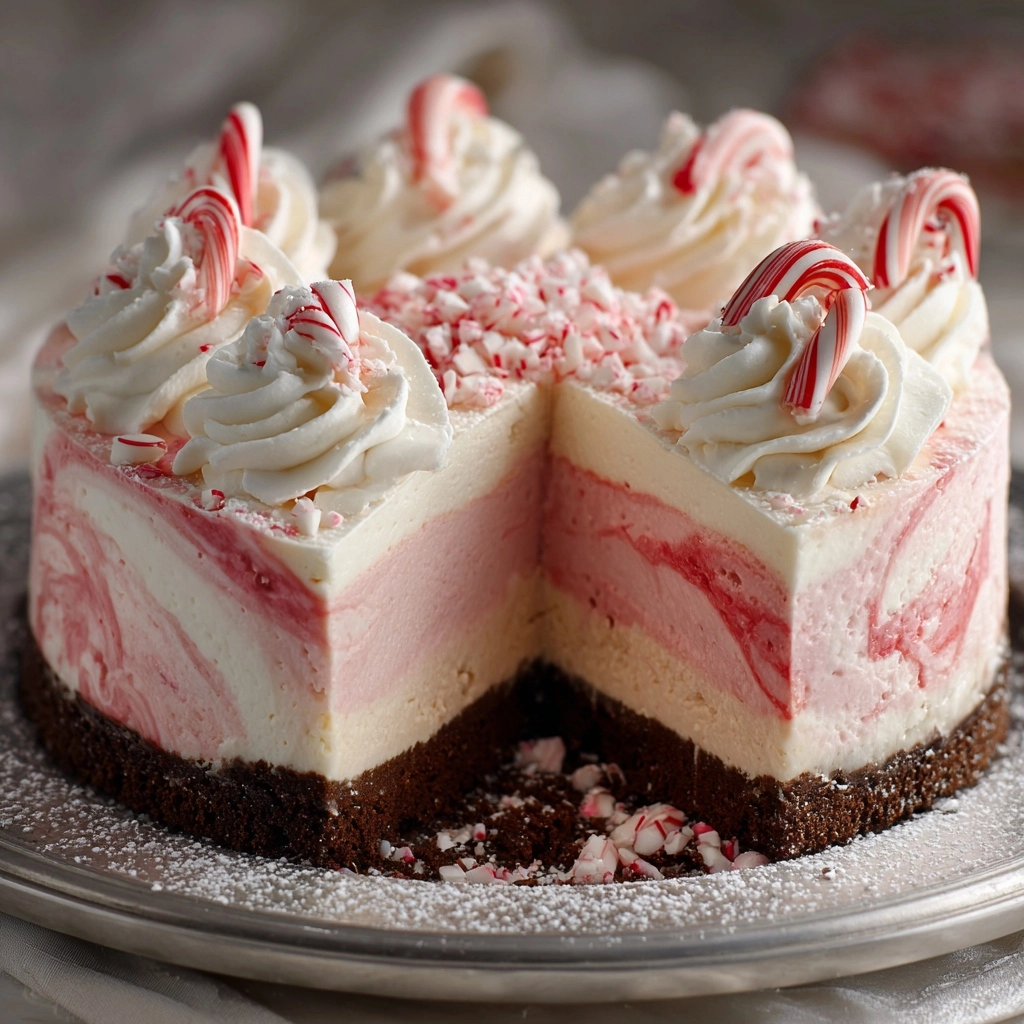
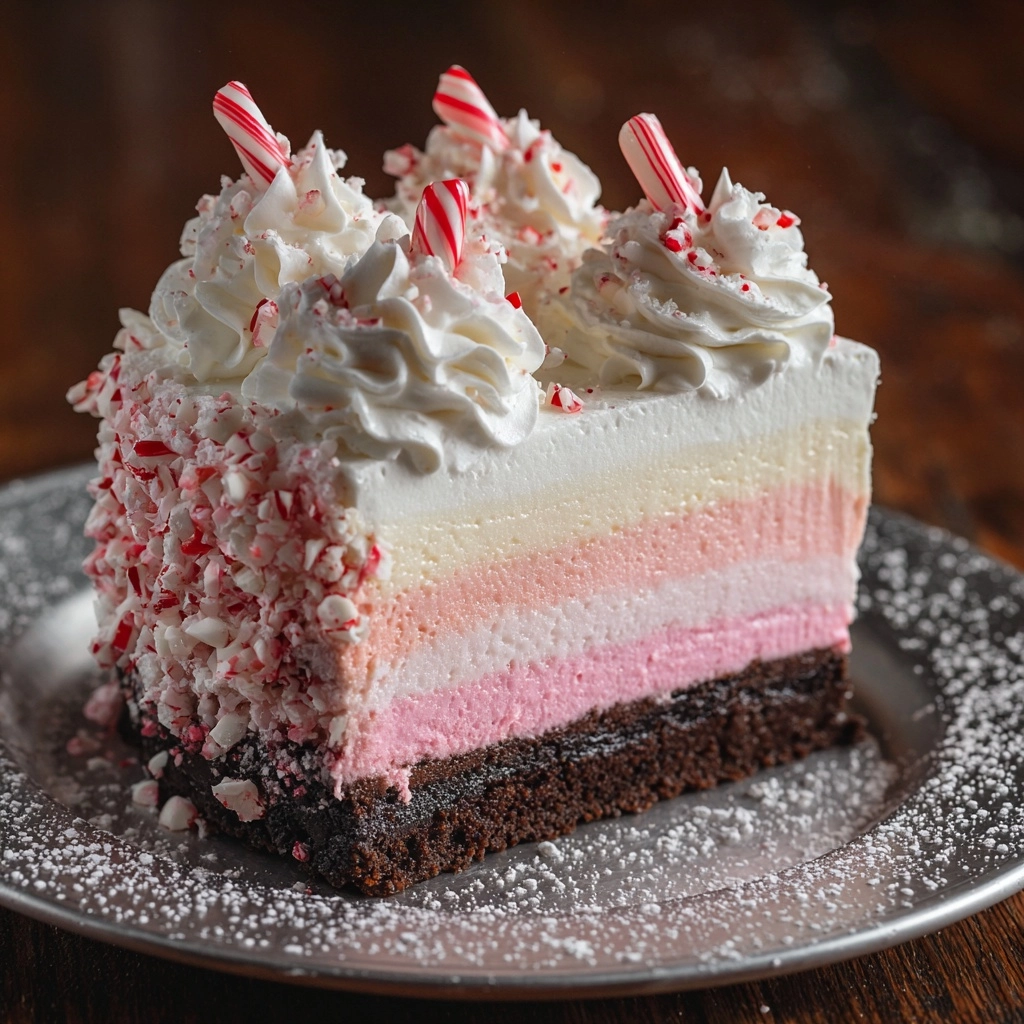
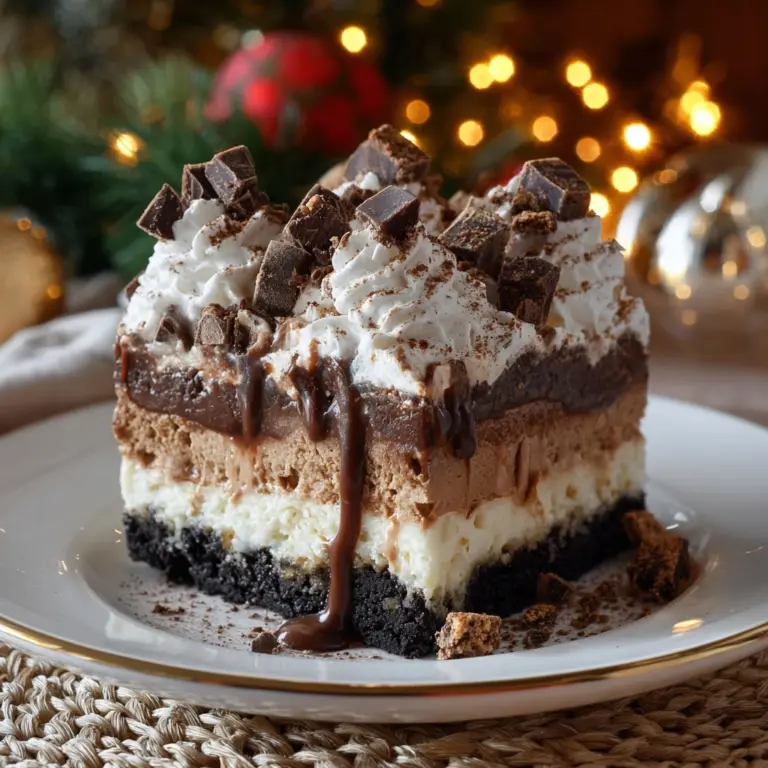
If you’re searching for a showstopping dessert that perfectly captures the spirit of the holidays, look no further than the Ultimate Festive Peppermint Ice Cream Cake. This no-bake masterpiece brings together layers of crunchy chocolate cookie crust, creamy peppermint ice cream, fluffy whipped topping, and a dazzling shower of crushed peppermint candies. It’s a celebration in every bite and so easy to make ahead for parties, potlucks, or a cozy night in with loved ones. Whether you’re a peppermint fanatic or just craving a refreshing twist on classic ice cream cake, this treat delivers festive flavor, gorgeous presentation, and that magical chill that signals the most wonderful time of the year.
Ingredients You’ll Need
Every ingredient in the Ultimate Festive Peppermint Ice Cream Cake has a starring role, bringing flavor, texture, or a pop of color to the party. You’ll be amazed at how a handful of simple supermarket finds can be transformed into a winter wonderland on a plate!
- Chocolate sandwich cookies (1 package, 14.3 ounces, crushed): Provides a rich, crunchy base that’s the perfect contrast to the creamy ice cream.
- Unsalted butter (1/4 cup, melted): Helps bind the cookie crumbs together for a sturdy, flavorful crust.
- Peppermint ice cream (1.5 quarts, softened): The star of the show—brings cool, minty freshness and a festive pink hue.
- Cool Whip (1 container, 8 ounces, thawed): Creates a fluffy, sweet layer that lightens up the cake and adds beautiful volume.
- Peppermint extract (1/2 teaspoon, optional): Boosts the minty flavor for extra holiday cheer if you love bold peppermint.
- Crushed peppermint candies or candy canes (1/2 cup): Adds sparkle, color, and a delightful crunch to every bite.
- Chocolate syrup or hot fudge (for drizzling): Brings a decadent, chocolatey finish that pairs perfectly with mint.
- Extra whipped topping and crushed peppermint (optional, for garnish): Makes each slice look irresistibly festive and special.
How to Make Ultimate Festive Peppermint Ice Cream Cake
Step 1: Build the Cookie Crust
Start by combining the crushed chocolate sandwich cookies with the melted unsalted butter in a mixing bowl. Stir until every crumb is nicely coated, then press the mixture firmly into the bottom of a 9-inch springform pan or deep pie dish. The key is to pack it down well so the crust holds together when slicing. Pop the pan into the freezer for 10 to 15 minutes to let the base set up while you prepare the next layer.
Step 2: Layer on the Peppermint Ice Cream
While the crust chills, let your peppermint ice cream sit out just long enough to become spreadable—think soft-serve texture, not melted. Scoop the softened ice cream over the cold crust and gently spread it into an even layer with a spatula. Smooth the top so you get that perfect slice later. Return the cake to the freezer for at least 30 minutes to firm up the ice cream before adding the next layer.
Step 3: Whip Up the Topping
In a separate bowl, stir together the thawed Cool Whip and, if you want an extra minty kick, the peppermint extract. This fluffy topping adds a cloud-like finish and balances out the richness of the ice cream. Spread the Cool Whip mixture evenly over the frozen ice cream layer, making sure to reach the edges for a clean look.
Step 4: Add the Festive Touches
Sprinkle a generous handful of crushed peppermint candies or candy canes across the top for a burst of color and crunch. Then, take your chocolate syrup or warmed hot fudge and drizzle it back and forth over the surface. The contrast of chocolate and mint is pure dessert magic! Cover the cake with foil or plastic wrap and freeze for at least 4 hours, or overnight for best results.
Step 5: Serve and Garnish
When it’s time to serve, let the Ultimate Festive Peppermint Ice Cream Cake sit out for 5 to 10 minutes to soften slightly, making slicing a breeze. For a bakery-worthy finish, add extra dollops of whipped topping and a pinch more crushed peppermint just before serving. Every slice will look as good as it tastes!
How to Serve Ultimate Festive Peppermint Ice Cream Cake

Garnishes
Garnishing is half the fun with this dessert! Pile on extra whipped topping, sprinkle a bit more crushed peppermint, or even add a few whole mini candy canes for that over-the-top holiday sparkle. A drizzle of extra chocolate syrup right before serving never hurts either.
Side Dishes
This cake is a dazzling centerpiece, but if you want to round out your dessert spread, serve it alongside mugs of hot chocolate, spiced coffee, or peppermint tea. A bowl of fresh winter berries or a platter of crisp biscotti makes a lovely contrast to the creamy, chilly cake.
Creative Ways to Present
You can cut the cake into elegant wedges, or try slicing it into squares for a fun, party-ready treat. If you’re hosting a crowd, make individual mini cakes using a muffin tin lined with cupcake papers—everyone gets their own adorable dessert! For a truly festive look, serve on a tray lined with fresh holly leaves or sparkly edible glitter.
Make Ahead and Storage
Storing Leftovers
If you’re lucky enough to have leftovers, simply cover the cake tightly with plastic wrap or foil and keep it in the freezer. It will stay fresh and delicious for up to a week—just be sure it’s well-sealed to prevent any freezer odors from creeping in.
Freezing
The Ultimate Festive Peppermint Ice Cream Cake is designed for freezing, making it a fantastic make-ahead option for busy holiday schedules. For best texture, freeze the cake for at least 4 hours before serving, and up to one week for optimal freshness and flavor.
Reheating
No reheating required—this cake is meant to be enjoyed frozen! Just let it sit at room temperature for a few minutes to soften slightly, then slice and serve. If the cake is rock-hard, allow 10 minutes before serving to ensure perfect texture.
FAQs
Can I use homemade whipped cream instead of Cool Whip?
Absolutely! Homemade whipped cream works beautifully as a topping. Just whip 1 cup of cold heavy cream with a tablespoon of powdered sugar until soft peaks form, then spread it on as you would the Cool Whip layer.
What’s the best way to crush the cookies and peppermint candy?
For cookies, a food processor gives you fine, even crumbs in seconds. For the peppermint candies or candy canes, place them in a zip-top bag and crush with a rolling pin or mallet—fun and stress-relieving!
Can I make this cake gluten free?
Definitely! Use gluten-free chocolate sandwich cookies for the crust and double-check your peppermint ice cream and toppings to ensure they’re gluten free, too. The rest of the assembly stays exactly the same.
What other flavors of ice cream could I use?
If you want to experiment, try layering chocolate ice cream with the peppermint, or even swap in cookies and cream for a new twist. This recipe is flexible—follow your cravings and get creative!
How far in advance can I make the Ultimate Festive Peppermint Ice Cream Cake?
This cake can be made up to a week ahead of time. Just assemble, cover tightly, and freeze until you’re ready to wow your guests (or yourself) with this holiday treat.
Final Thoughts
There’s something truly magical about sharing the Ultimate Festive Peppermint Ice Cream Cake with family and friends. With its cool minty layers, chocolatey crunch, and festive flair, it’s sure to become a holiday tradition you look forward to year after year. Give it a try and watch the smiles light up around your table—you’ll be glad you did!
Print
Ultimate Festive Peppermint Ice Cream Cake Recipe
- Prep Time: 20 minutes
- Cook Time: 0 minutes
- Total Time: 4 hours 20 minutes
- Yield: 12 servings
- Category: Dessert
- Method: Freezing
- Cuisine: American
- Diet: Vegetarian
Description
A delightful no-bake frozen dessert perfect for the holidays, featuring a crunchy chocolate cookie crust, layers of creamy peppermint ice cream, and whipped topping, all garnished with crushed peppermint candies and a drizzle of rich chocolate syrup.
Ingredients
Crust
- 1 package (14.3 ounces) chocolate sandwich cookies, crushed
- 1/4 cup unsalted butter, melted
Ice Cream Layer
- 1.5 quarts peppermint ice cream, softened
Topping
- 1 container (8 ounces) Cool Whip, thawed
- 1/2 teaspoon peppermint extract (optional)
- 1/2 cup crushed peppermint candies or candy canes
- Chocolate syrup or hot fudge, for drizzling
- Extra whipped topping and crushed peppermint for garnish (optional)
Instructions
- Prepare the crust: In a medium bowl, mix the crushed chocolate sandwich cookies with melted butter until the mixture is evenly coated. Press this mixture firmly into the bottom of a 9-inch springform pan or a deep pie dish to form an even crust layer. Place it in the freezer for 10–15 minutes to set firmly.
- Soften and spread ice cream: While the crust chills, allow the peppermint ice cream to soften at room temperature for easier spreading. Once softened, spread it evenly and smoothly over the chilled cookie crust. Return the pan to the freezer and freeze for at least 30 minutes or until the ice cream layer is firm to the touch.
- Prepare and add whipped topping: In a small bowl, combine the thawed Cool Whip with peppermint extract if desired, gently folding to mix. Spread this whipped topping evenly over the firm ice cream layer.
- Decorate: Sprinkle crushed peppermint candies over the whipped topping layer. Drizzle generously with chocolate syrup or warmed hot fudge sauce to add a rich, chocolatey finish.
- Freeze until set: Cover the entire cake tightly and freeze for a minimum of 4 hours, or preferably overnight, to allow all layers to fully set and flavors to meld.
- Serve: Before serving, remove the cake from the freezer and allow it to sit at room temperature for 5–10 minutes to soften slightly, making slicing easier. Garnish with extra whipped topping and crushed peppermint candies if desired. Slice and enjoy your festive peppermint ice cream cake!
Notes
- This ice cream cake can be prepared up to one week in advance and kept tightly covered in the freezer to preserve freshness.
- For an extra chocolatey twist, add a layer of chocolate ice cream beneath the peppermint layer before adding the whipped topping.
- If peppermint extract is unavailable, the cake will still have a refreshing peppermint flavor from the ice cream and crushed candies.
- Use a sharp, warm knife to slice the cake more cleanly by running it under hot water and wiping dry between cuts.
Nutrition
- Serving Size: 1 slice
- Calories: 390
- Sugar: 30g
- Sodium: 260mg
- Fat: 22g
- Saturated Fat: 12g
- Unsaturated Fat: 9g
- Trans Fat: 0g
- Carbohydrates: 42g
- Fiber: 1g
- Protein: 4g
- Cholesterol: 35mg
