
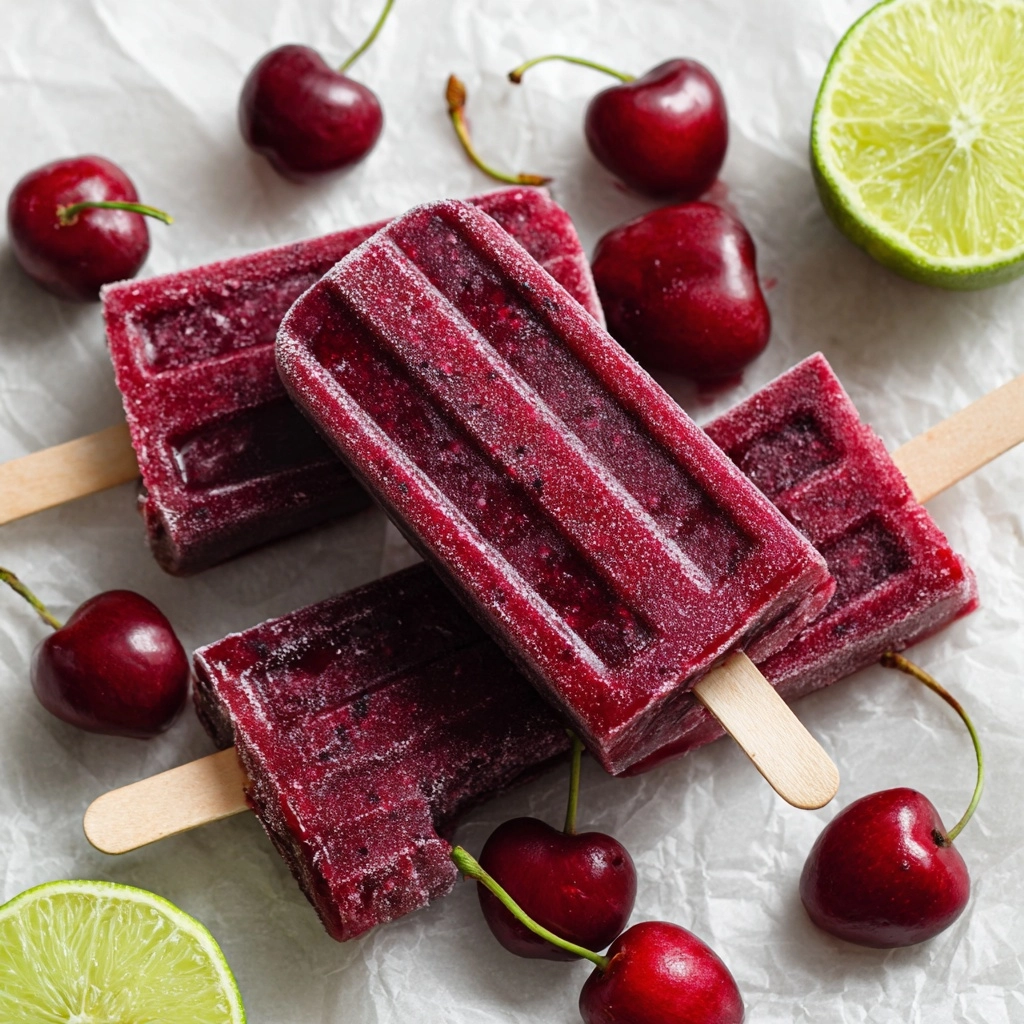
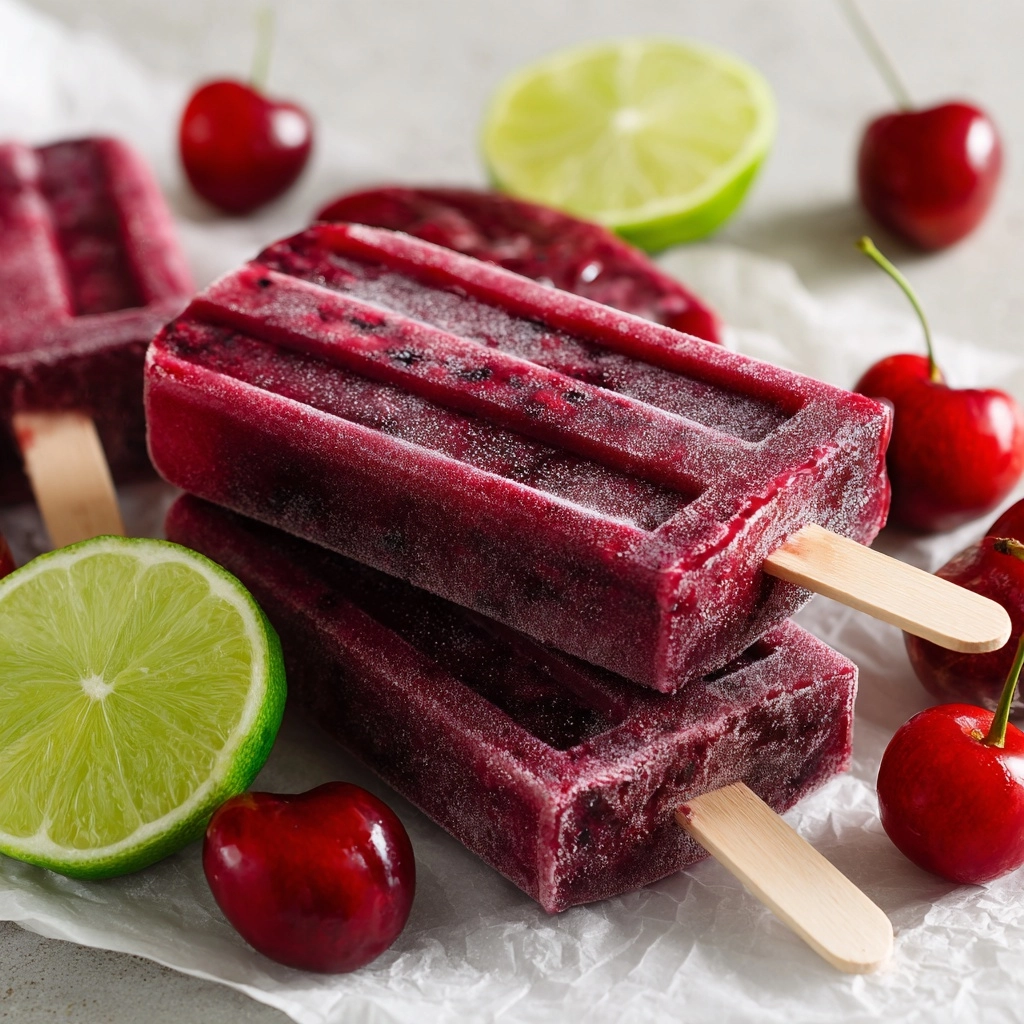
If you’re looking for the ultimate warm-weather treat that’s as delicious as it is refreshing, Cherry Lime Ice Pops are your answer! These vibrant pops combine the juicy sweetness of cherries with the bright zing of fresh lime, all wrapped up in a naturally sweetened, icy snack. With just a handful of wholesome ingredients and a few minutes of prep, you can whip up a batch of these cheerful, fruity pops that everyone will love. Whether you’re hosting a backyard barbecue or just need a cool afternoon pick-me-up, Cherry Lime Ice Pops are sure to become your new summer staple.
Ingredients You’ll Need
-
Ice Pop Mixture
- 2 cups fresh or frozen cherries, pitted
- 1/2 cup fresh lime juice (about 4–5 limes)
- 1/3 cup honey or agave syrup
- 1/2 cup water
- 1 teaspoon lime zest (optional)
How to Make Cherry Lime Ice Pops
Step 1: Blend the Fruit Mixture
Start by adding your pitted cherries, freshly squeezed lime juice, honey (or agave syrup), water, and lime zest (if using) to a blender. Blend until everything is completely smooth and vibrant. Give it a taste—you can always adjust the sweetness now if you like your pops a bit more tart or a tad sweeter!
Step 2: Strain for Smoothness (Optional)
If you love a perfectly smooth ice pop, pour the blended mixture through a fine mesh sieve to remove any cherry skins or pulp. This step is totally up to you; some people prefer a bit of texture, while others like their Cherry Lime Ice Pops silky and uniform.
Step 3: Fill the Molds
Pour the cherry-lime mixture evenly into your ice pop molds, leaving just a little room at the top for the pops to expand as they freeze. For an extra burst of fun and flavor, you can pop a few whole cherry halves or thin lime slices right into the molds before pouring—this makes your pops look as good as they taste!
Step 4: Insert Sticks and Freeze
Carefully insert the sticks into the center of each mold. Place the molds in your freezer and let them chill for at least 4 to 6 hours, or until the Cherry Lime Ice Pops are completely solid. The hardest part is waiting!
Step 5: Unmold and Enjoy
When you’re ready to serve, run the molds under warm water for a few seconds to help release the pops. Gently wiggle them out, and your Cherry Lime Ice Pops are ready to delight. Enjoy immediately for the ultimate frosty treat.
How to Serve Cherry Lime Ice Pops
Garnishes
For a special touch, try rolling your Cherry Lime Ice Pops in extra lime zest or a sprinkle of finely chopped fresh mint right after unmolding. You can even dip the tips in a little coarse sugar for a sparkly, sweet finish—kids and adults alike will love the surprise!
Side Dishes
Pair your Cherry Lime Ice Pops with other light summer snacks, like a crisp fruit salad, a platter of chilled watermelon, or even crunchy coconut chips. They’re also a fantastic follow-up to a picnic lunch or a grilled veggie feast, adding a refreshing finale to any meal.
Creative Ways to Present
Get playful with your presentation! Arrange the Cherry Lime Ice Pops in a tall glass filled with ice cubes, or serve them on a chilled platter lined with lime slices and whole cherries. For parties, tuck each pop into a paper sleeve or wrap with a ribbon for a festive, grab-and-go treat.
Make Ahead and Storage
Storing Leftovers
If you have any Cherry Lime Ice Pops left over (which is honestly rare!), keep them in their molds or transfer to a freezer-safe bag. Separate them with a piece of parchment paper so they don’t stick together, and your pops will stay fresh and flavorful for up to two weeks.
Freezing
These pops are all about make-ahead convenience. Once fully frozen, they’re ready to go whenever you need a cool treat. Just remember to keep them at the back of the freezer where the temperature stays the coldest for best texture and flavor retention.
Reheating
Since these are frosty treats, there’s no reheating required! If they’re too solid straight out of the freezer, let them sit at room temperature for a minute or two or run the molds briefly under warm water to loosen them up. Enjoy immediately once they’re released from the molds.
FAQs
Can I use bottled lime juice instead of fresh?
Fresh lime juice gives Cherry Lime Ice Pops their signature zing, but in a pinch, you can use bottled. Just note that the flavor may not be quite as bright or aromatic as using freshly squeezed limes.
Can I substitute other sweeteners?
Absolutely! While honey and agave keep these pops naturally sweet, you can try maple syrup or a sugar-free alternative if you prefer. Just be sure to taste and adjust the sweetness as needed before freezing.
Do I need a special ice pop mold?
Nope! If you don’t have molds, you can use small paper cups and wooden sticks, or even make mini pops in an ice cube tray for bite-sized treats. The cherry-lime flavor shines no matter what shape you choose.
Can I add alcohol for grown-up pops?
Yes, you can turn these into a cocktail-inspired treat by adding a splash of vodka or rum. Just keep in mind that too much alcohol can prevent the pops from freezing solid, so add only a small amount.
How do I get my pops out of the mold without breaking them?
The easiest trick is to hold the mold under warm running water for a few seconds and gently wiggle the stick. The Cherry Lime Ice Pops should slide right out in perfect, frosty form!
Final Thoughts
There’s something truly magical about making your own Cherry Lime Ice Pops at home—the vibrant color, the zesty-sweet flavor, and the pure joy of enjoying a treat you crafted yourself. Give this recipe a try, share with friends and family, and watch these frosty pops become a new favorite in your summer lineup!
Print
Cherry Lime Ice Pops Recipe
- Prep Time: 10 minutes
- Cook Time: 0 minutes
- Total Time: 4–6 hours (includes freezing)
- Yield: 6 ice pops
- Category: Dessert, Snack
- Method: Freezing
- Cuisine: American
- Diet: Vegan
Description
Refreshing and naturally sweetened Cherry Lime Ice Pops made with fresh cherries, zesty lime juice, and a touch of honey or agave syrup. These homemade fruit pops are perfect for a healthy, cooling treat on hot summer days.
Ingredients
Ice Pop Mixture
- 2 cups fresh or frozen cherries, pitted
- 1/2 cup fresh lime juice (about 4–5 limes)
- 1/3 cup honey or agave syrup
- 1/2 cup water
- 1 teaspoon lime zest (optional)
Instructions
- Blend Ingredients: In a blender, combine the cherries, lime juice, honey or agave syrup, water, and lime zest if using. Blend until smooth to create a vibrant, fruity base.
- Adjust Sweetness: Taste the blended mixture and add more honey or agave syrup if you prefer a sweeter ice pop. For a smoother texture, optionally strain the mixture through a fine mesh sieve to remove cherry skins.
- Fill Molds: Pour the prepared mixture evenly into ice pop molds, leaving some space at the top to allow for expansion as they freeze. Insert the ice pop sticks firmly into each mold.
- Freeze: Place the molds in the freezer and freeze for at least 4 to 6 hours, or until fully solidified.
- Unmold and Serve: To release the ice pops, briefly run the molds under warm water for a few seconds. Gently pull out the pops and enjoy a cool, refreshing treat.
Notes
- For a fun twist, add whole cherry halves or thin lime slices into the molds before pouring the mixture for added texture and visual appeal.
- These ice pops are naturally sweetened and make a healthy summer dessert or snack option.
- Use agave syrup to make the recipe fully vegan and suitable for those avoiding honey.
- Ensure limes are fresh for best zesty flavor impact.
Nutrition
- Serving Size: 1 ice pop
- Calories: 70
- Sugar: 12g
- Sodium: 0mg
- Fat: 0g
- Saturated Fat: 0g
- Unsaturated Fat: 0g
- Trans Fat: 0g
- Carbohydrates: 18g
- Fiber: 1g
- Protein: 0g
- Cholesterol: 0mg


